Idea: Introduction to Angular (Services, input&output - component interaction).
Background: The Ultimate Angular-cli Reference and Angular.io
Idea: Introduction to Angular (Services, input&output - component interaction).
Background: The Ultimate Angular-cli Reference and Angular.io
In this exercise you have to refactor the "simple calculator" from previous exercises in 9 steps
Step 1 - Create a new Service
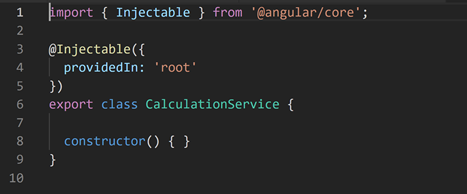
Create a new service with the name CalculatorService by running: ng g service calculation.
Notice: this will create a new fil with the name: calculation.service.ts, with a CalculationService class.
The file should looks like this:
Notice the import of "Injectable" and the class annotation with @Injectable( ).
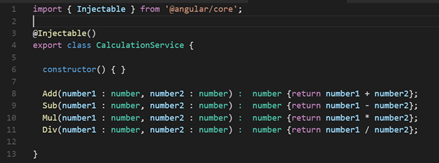
Step 2 - Implement the CalculationService class
Implement the Add, Sub, Mul and Div functions, they should all take 2 numbers as arguments and return the result of the calculation:
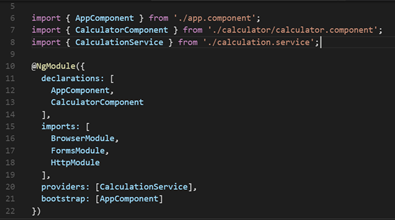
Step 3 - Register the CalculatorService in app.module.ts
Add an import statement in the app.module to import the new service and register the service by adding the service to the providers in @NgModule:
Step 4 - Refactor the class CalculatorComponent (calculator.component.ts) to use the new Service
First, import the CalculationService:
![]()
Second, inject the CalculationService into the CalculatorComponent by adding the service as a parameter to the constructor:
![]()
Finnaly, refactor all the calculation functions to use the Service:

Step 5
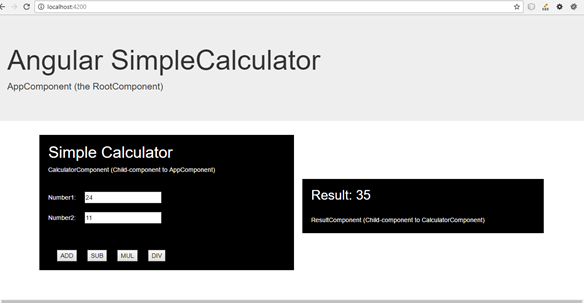
Start the server by running: ng serve -o to watch the result. It shoud still look something like this:
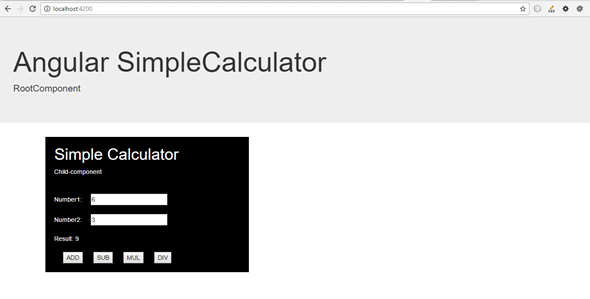
Now you are ready to make a new component ResultComponent, a child-component to the CalculatorComponent.
The ResultComponent should display the
result of the calculation.
In this case we have a simple direct parent-child relation between CalculatorComponent and ResultComponent.
Step 6 - Create a new component
Stop the Server if its still running (ctrl + c).
Create a new component ResultComponent by running: ng g c Result
Step 7 Add imports ...
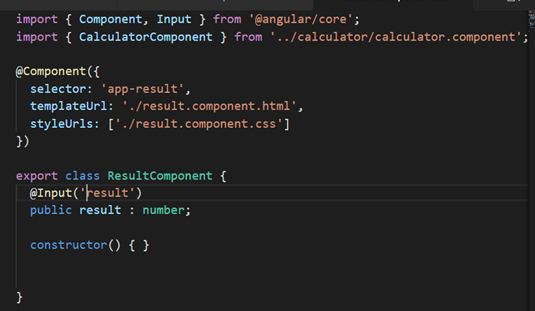
Add imports in the file result.components.ts (import Input from angular.core and CalculatorComponent)
Add a property named result to the class ResultComponent. The property must be annotated with @Input( )
result.component.ts
First we have to create a property 'result' in the child-component: ResultComponent.
The value to the result-property is passed in from the parent-component CalculatorComponent - so decorate the result-property with the @Input('result') annotation
and import Input from '@angular/core' :
Step 8- Move the view of the result from CalculatorComponent to ResultComponent
Hint: move "Result: {{ result }}" from calculator.component.html to result.component.html.
Make a nice styling of the new component ;-)
calculator.component.html
Insert <app-result> in the parent template: calculator.component.html (don't forget to add the property binding, so you can pass the result property value from the parent to the result property in the child-component):
![]()
Step 9
Start the server by running: ng serve -o to watch the result. It shoud look something like this:
Congratulation! - Angular is still rocking and now you have introduced Services and direct paret-child communication in your second (but still very small) Angular App.
/ Henrik H