Idea: Introduction to Angular (Input&output - component interaction).
Background: The Ultimate Angular-cli Reference and Angular.io
Idea: Introduction to Angular (Input&output - component interaction).
Background: The Ultimate Angular-cli Reference and Angular.io
In this exercise you have to make communications between child-components (siblings) in 10 steps.
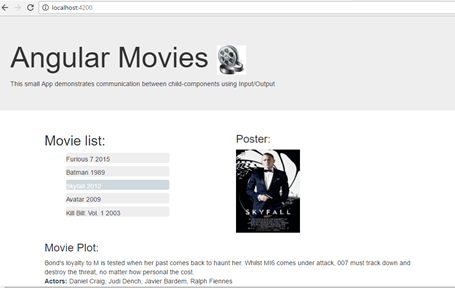
The Application you have to create should list some movies and display details of a selected movie.
Step 1 - Download an initial project - MovieInputOutput
Download and extract the MovieInputOutput.zip folder in your VSCode/Angular folder.
Navigate to the new folder: MovieInputOutput and create the initial project by running: npm install
(Notice: just ignore err/warnings)
Verify, that it works by running: ng serve -o.
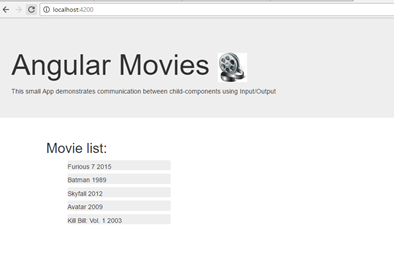
Your initial project looks like this:
Step 1.b - Inspect the code
Take a tour around the code:
The next step is to update the MovieList component. The component have to use an EventEmitter to sendt the selected movie from the MovieList component to the parrent-component (App component). The parrent component can then sendt the selected movie to the child-components (MoviePoster and MoviePlot).
Step 2 - MovieList Component (movie-list.components.ts)
Import Output and EventEmitter from angular/core:
import { Output, EventEmitter } from '@angular/core';
Create a new property selectedMovie of the type Movie (use | undefined to allow that the property can be uninitialized)
selectedMovie : Movie | undefined;
Create a new property movieSelected, initialize the new property with a new EventEmitter<Movie>-object and annotate with @Output('movie-selected'):
@Output('movie-selected') public movieSelected = new EventEmitter<Movie>();
Add a function onSelect, so it makes a call of the emit-function with the selected movie as argument:
public onSelect(movie : Movie){
this.selectedMovie = movie;
this.movieSelected.emit(movie);}
Step 2a - MovieList Component (movie-list.components.html)
Update ngFor the <li> tag in the html page with:
<li *ngFor="let movie of movies" [class.selected]="movie === selectedMovie"(click)="onSelect(movie)" >
Why? - What is the purpose?
Step 2b - AppComponent (app.component.ts)
Update the AppComponent with a new property selectedMovie of the type Movie (use | undefined to allow that the property can be uninitialized)
public selectedMovie : Movie | undefined;
and a call-back funktion movieSelected(movie:Movie) to update the selectedMovie:
public movieSelected(movie: Movie) { this.selectedMovie = movie; }
Don't forget to import Movie:
import { Movie } from './Shared/Movie';
Step 2c - AppComponent (app.component.html)
Update the <app-movie-list> tag:
<app-movie-list (movie-selected)="movieSelected($event)"> </app-movie-list>
Why? - What is the purpose?
Verify, that the app is still working!
Ups - it dosen't work! - notice the error and change the accessibility of the property selectedMovie to public.
In the next 3 step you have to create the component that displays the Poster.
Step 3.1 - MoviePoster Component
Stop the Server (ctrl C) and create a new component MoviePoster (ng g c MoviePoster).
Step 3.2 - MoviePoster Component (movie-poster.component.ts)
The component must have a property with the name movie of the type Movie (the interface Movie is defined in the file Movie.ts in the folder Shared, so remember to import Movie from: '../Shared/Movie').
Annotate the property with the @Input( ) annotation (notice: import Input from angular/core):
@Input( ) public movie : Movie | undefined;
Step 3.3 - MoviePoster Template (movie-poster.component.html)
Replace the default html-code with a <h3> with the text: "Poster:" and an image with the poster-image to the selected movie. The property Poster in class Movie contains a reference to the poster-image in the folder image in the assets folder (src/assets/Image).
Use the string interpolation to bind the src to the Poster.property.
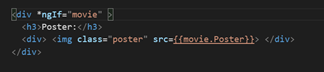
<h3>Poster:</h3>
<div> <img class="poster" src={{movie.Poster}}> </div>
Step 3.4 - MoviePoster Style (movie-poster.component.css)
Set the class-attribute to "poster" and set the width to 10em and the height to 13em in the CSS-file.
.poster{ width: 10em; height: 13em; }
Step 3.5 - AppModule (app.module.ts)
Verify that MoviePosterComponent is Imported in the AppModule and that the MoviePosterComponent is added to the Modules Declarations.
Step 3.6 - AppComponent (app.component.html)
Test the app - run: ng serve -o
Verify that you will see the Poster when you select a movie.
Yes your right! You don't see any Poster!!
Did you add the <app-movie-poster> tag in app.component.html? No, ok then do it and add a property-binding so we can pass the selected movie to the MoviePoster component:
<app-movie-poster [movie]="selectedMovie"> </app-movie-poster>
Step 3.7 - MoviePoster Template (movie-poster.component.html)
Notice: when the application starts up there is no selected movies. The result is an empty border and a error (since movie is undefined in MoviePoster).
To prevent that - add a div-tag with: a *ngIf dicrective:
Step 4.1 MoviePlot Component
Create a new component MoviePlot.
Step 4.2 - MoviePlot Component (movie-plot.component.ts)
The component must also have a property with the name movie of the type Movie.
Annotate the property with the @Input( ) annotation (notice: import Input from angular/core)
Step 4.3 - MoviePlot Template (movie-plot.component.html)
Insert a header with "Movie Plot" and display information about the movie plot and actors
Step 4.4 - MoviePlot Style (movie-plot.component.css)
No special styling needed.
Step 4.5-4.7 - AppModule
Like in step 3.5 - 3.7 - make a propper update of the AppModule!
Step 5 - Test/Verify
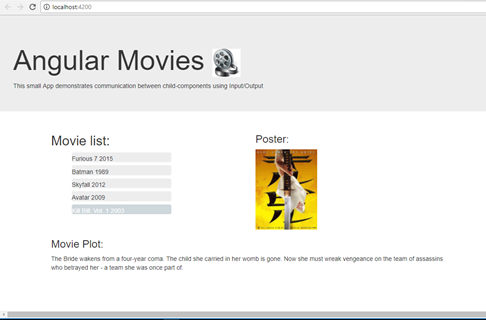
Verify that you got something like this:
Congratulation! - Angular is rocking a little more and now your components can interact (but your Angular App is still very small).
/ Henrik H